

Introduction
Adobe Photoshop is the most powerful and widely used photo editing software. Whether you’re a complete beginner or looking to refine your skills, learning Photoshop for beginners can feel overwhelming due to its vast number of tools and options. However, once you understand the Photoshop basics, you can easily edit, enhance, and transform images professionally.
This photo editing tutorial will guide you through the essential tools and techniques, helping you learn Photoshop basics step by step. By the end of this guide, you’ll be able to crop, retouch, add text, apply filters, and make adjustments to your photos with confidence.
Step 1: Getting Started with Photoshop

Before diving into editing, let’s first understand Photoshop’s workspace and set up the essentials.
1.1 Opening Photoshop and Creating a New Project
- Launch Adobe Photoshop on your computer.
- Click File > New to create a new document.
- Choose a preset size or enter custom dimensions.
- Click Create to open a blank canvas.
1.2 Opening an Image for Editing
- Click File > Open and select the photo you want to edit.
- Your image will appear as a new layer in the workspace.
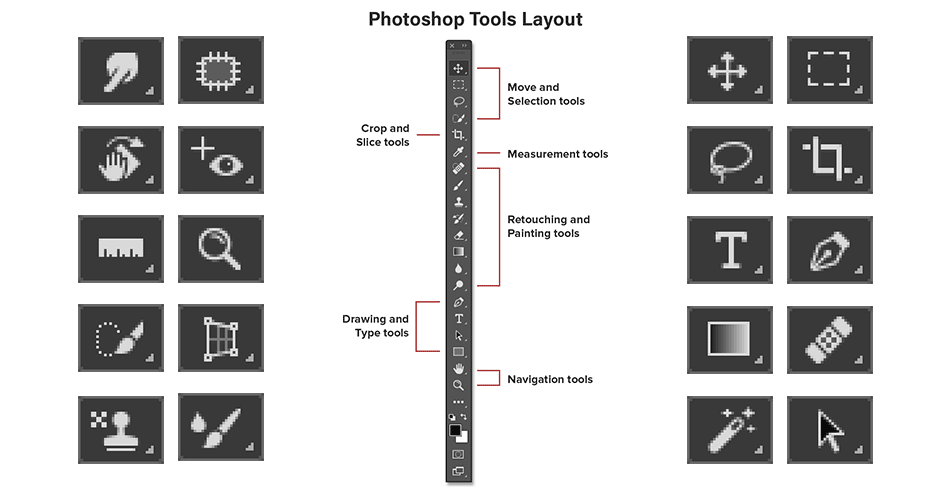
1.3 Understanding the Photoshop Interface
- Toolbar (Left Side) – Contains tools like selection, cropping, brush, and eraser.
- Layers Panel (Right Side) – Shows different elements of your project.
- Options Bar (Top) – Displays settings for the selected tool.
- Menu Bar (Top) – Access all Photoshop features like File, Edit, and Image.
Step 2: Essential Tools for Photo Editing
To learn Photoshop basics, you need to get familiar with the most commonly used tools for editing photos.
2.1 Crop and Resize an Image
The Crop Tool lets you cut out unwanted areas and improve composition.
How to Crop an Image:
- Select the Crop Tool (C on the keyboard).
- Adjust the crop area by dragging the edges.
- Press Enter to apply the crop.
Tip: Hold Shift while cropping to maintain the original aspect ratio.
2.2 Adjust Brightness, Contrast, and Colors
Photoshop offers several adjustment tools to enhance an image’s brightness, contrast, and color balance.
How to Adjust Image Brightness & Contrast:
- Go to Image > Adjustments > Brightness/Contrast.
- Move the sliders to adjust brightness and contrast.
- Click OK when satisfied.
How to Enhance Colors:
- Go to Image > Adjustments > Hue/Saturation.
- Adjust the Saturation slider to make colors more vibrant.
- Click OK to apply changes.
Tip: Use Ctrl + Z (Windows) or Cmd + Z (Mac) to undo mistakes.
2.3 Using Layers for Non-Destructive Editing

Layers allow you to edit different elements of an image separately.
How to Work with Layers:
- Open the Layers Panel (F7 to toggle).
- Click New Layer (Shift + Ctrl + N or Shift + Cmd + N on Mac).
- Name the layer and start making edits without affecting the original image.
Tip: Right-click on a layer and choose Duplicate Layer to create a backup before making changes.
2.4 Removing Blemishes and Unwanted Objects
Photoshop has powerful tools to retouch images and remove unwanted objects.
Using the Spot Healing Brush Tool:
- Select the Spot Healing Brush Tool (J on the keyboard).
- Adjust the brush size in the Options Bar.
- Click on blemishes or unwanted spots to remove them.
Using the Clone Stamp Tool:
- Select the Clone Stamp Tool (S on the keyboard).
- Hold Alt (Windows) / Option (Mac) and click on a clean area to sample.
- Brush over the object you want to remove.
Tip: Use the Zoom Tool (Z) to work on details more precisely.
Step 3: Enhancing Photos with Filters and Effects
Photoshop’s filters and effects allow you to enhance images creatively.
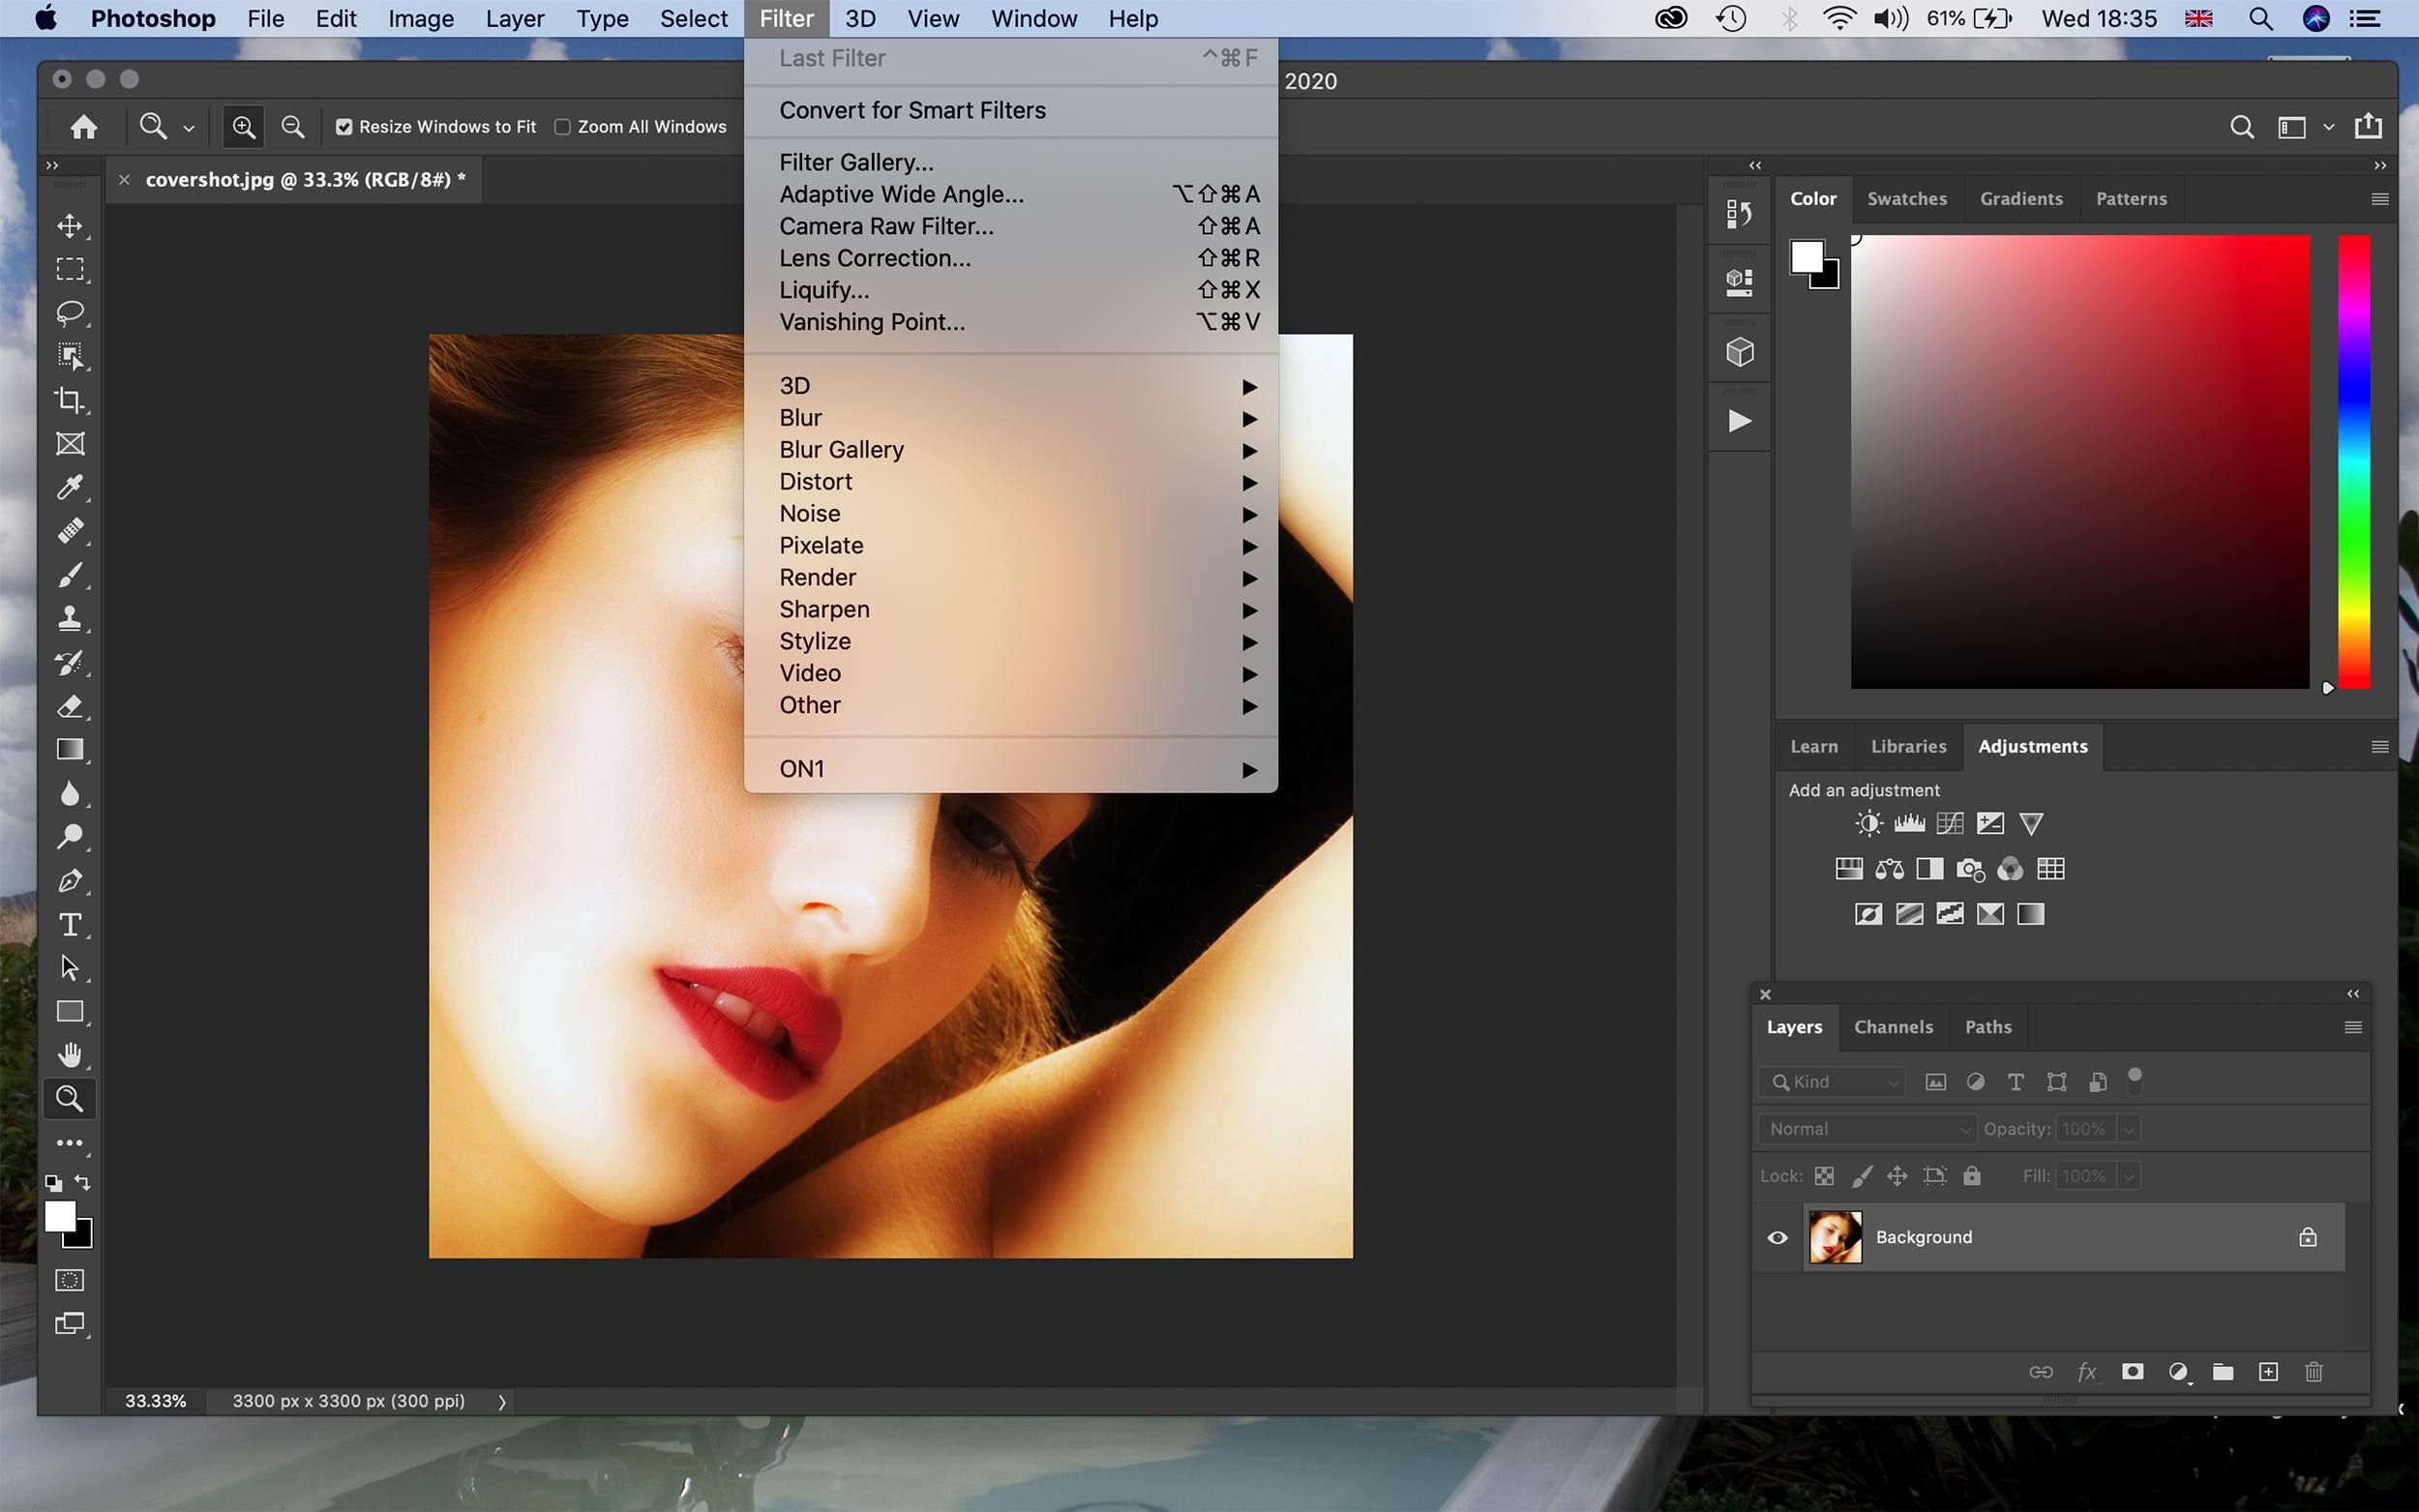
3.1 Applying Filters for Quick Edits
- Select your image layer.
- Go to Filter > Filter Gallery.
- Choose a filter like Sharpen, Blur, or Artistic Effects.
- Adjust the filter settings and click OK.
3.2 Adding Text to an Image
- Select the Text Tool (T on the keyboard).
- Click on the image and type your text.
- Use the Options Bar to change font, size, and color.
- Move and resize the text using the Move Tool (V).
Tip: Use Layer Styles (Right-Click Layer > Blending Options) to add shadows and outlines to your text.
Step 4: Saving and Exporting Your Edited Photo
Once you’re happy with your edits, you need to save your work correctly.
4.1 Saving as a Photoshop Project (PSD)
- Go to File > Save As.
- Choose PSD (Photoshop Document) to keep layers editable.
4.2 Exporting for Web or Social Media
- Go to File > Export > Save for Web.
- Choose JPEG for high-quality images.
- Adjust quality settings and click Save.
Tip: Use PNG format if your image has transparency.
FAQs
1. Is Photoshop difficult to learn for beginners?
Photoshop has a learning curve, but by focusing on basic tools like cropping, adjustments, and layers, beginners can quickly start editing photos.
2. What are the best Photoshop tools for photo editing?
Key tools include:
- Crop Tool (for resizing)
- Spot Healing Brush (for retouching)
- Adjustment Layers (for color correction)
- Text Tool (for adding text)
3. Can I edit photos in Photoshop without losing quality?
Yes! Use non-destructive editing techniques like adjustment layers and masks to preserve the original image.
4. How do I remove a background in Photoshop?
- Use the Select Subject tool in Select > Subject.
- Refine the selection using Select and Mask.
- Press Delete to remove the background.
5. What’s the difference between JPEG and PNG when saving images?
- JPEG is best for smaller file sizes but reduces quality.
- PNG keeps transparency and maintains better image quality.
Conclusion
Adobe Photoshop is a powerful tool that allows anyone to edit and enhance photos professionally. By mastering Photoshop basics such as cropping, retouching, and using layers, you can quickly improve your photo editing skills.